Tee for Me

This little method of converting a man’s XXL t-shirt into a shirt for me is something I developed when I started noticing that the fabrics they were using for women’s basic T-shirts were far inferior to what they were using for men’s t-shirts and there was nothing available in fabric stores that equaled what they were using for the men’s shirts either.  The women’s shirts I could buy were 2-3 times the price of the men’s and would shrink like mad and wear out after just a few washings while my husband’s and son’s t-shirts would last for years.  Well, I figured if I bought extra-large men’s T-shirts, there should be enough fabric there to make a shirt for a small-ish woman.  Turns out I was right.  Also, very early in the process I realized I could capitalize on some of the sewing already done.  So, I developed this way to make a shirt that fits me and I’ll share it with you:

First, get a man’s shirt that is big enough that your bust will fit comfortably within the armscye area of the man’s shirt.  This is key because the armholes are very deep in men’s shirts.  Also make sure your hips will fit lower down.

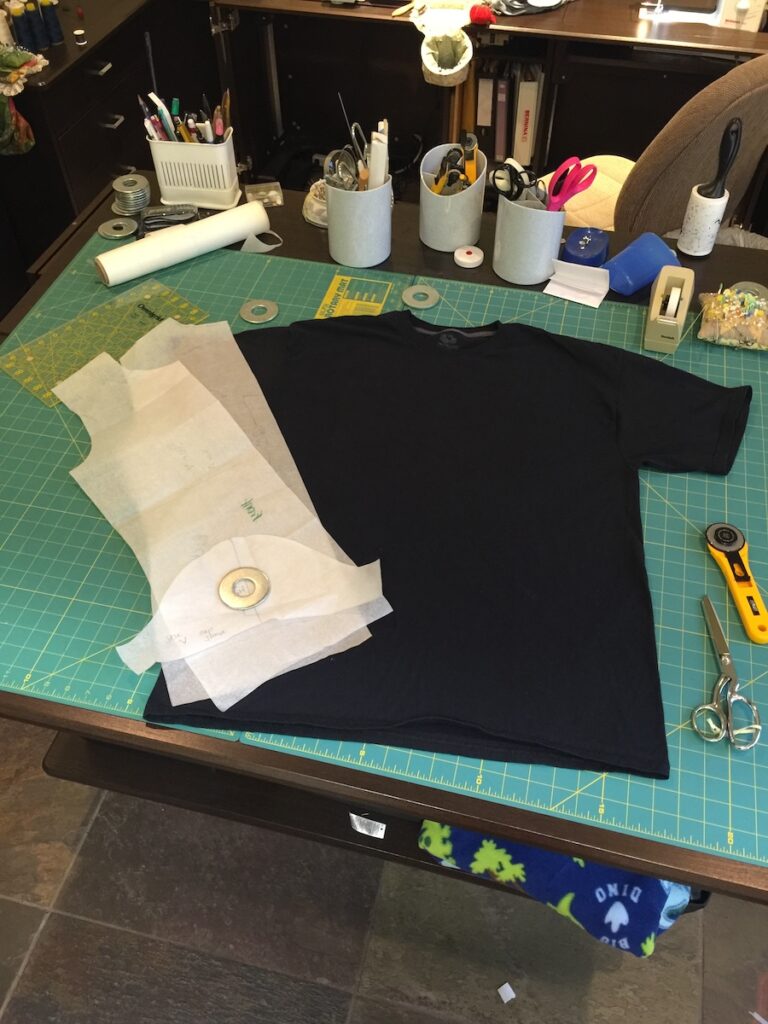
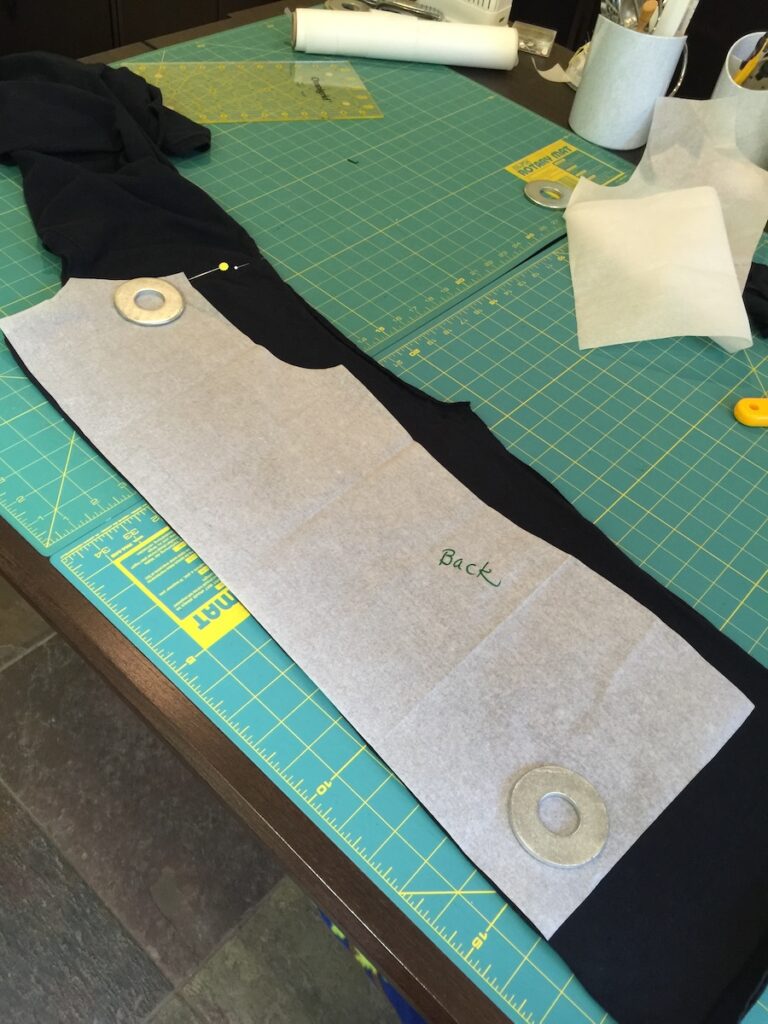
Next have a simple t-shirt pattern on hand that fits you well, the way you like to wear your shirts.  Note that often the fabric used in men’s shirts, while beefy and durable, might not have as much stretch and recovery as what you are used to sewing with if you make tees for yourself.  If it’s really stiff, you may need to go up a size.  I use Jalie 2805 for this and I do go up a size from my usual U to V.  You see the shirt I’m going to use and the pattern set out and ready to go.  Note that the shirt has been washed and dried in the same way that I plan to launder the final shirt:

Next step is to cut the shirt apart in this very specific way.  First, locate the side seam.  This can be tricky because these shirts rarely have actual side seams.  The body fabric is woven in a continuous tube and might be wildly off grain.  Here you see me beginning to make the cut:

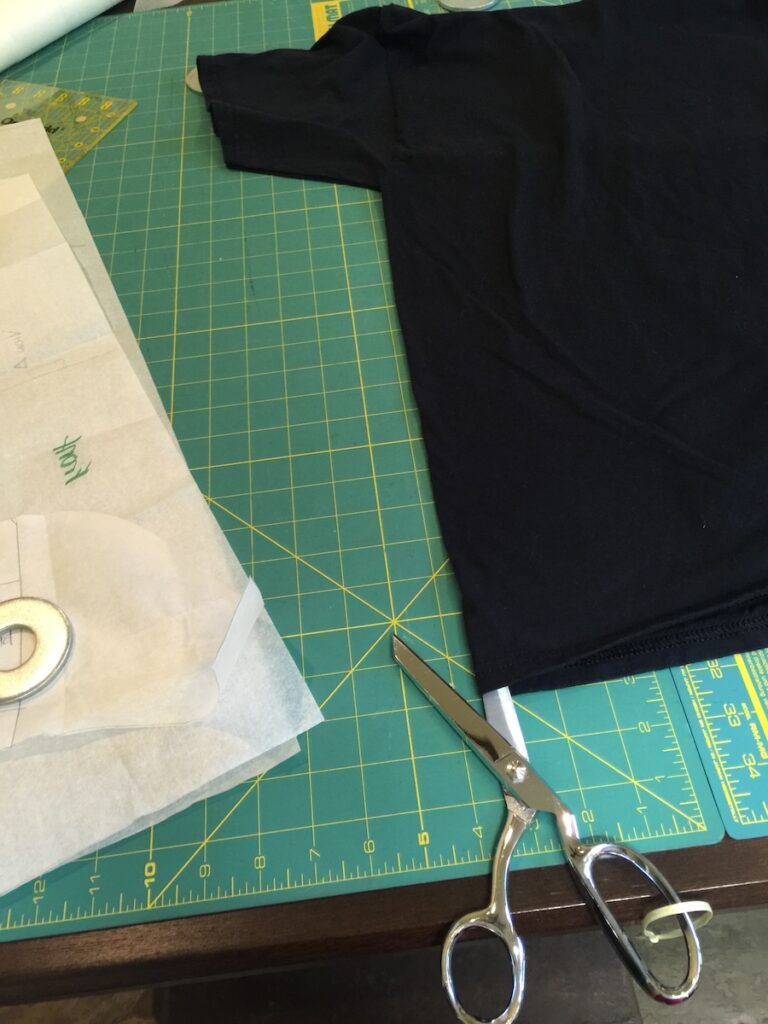
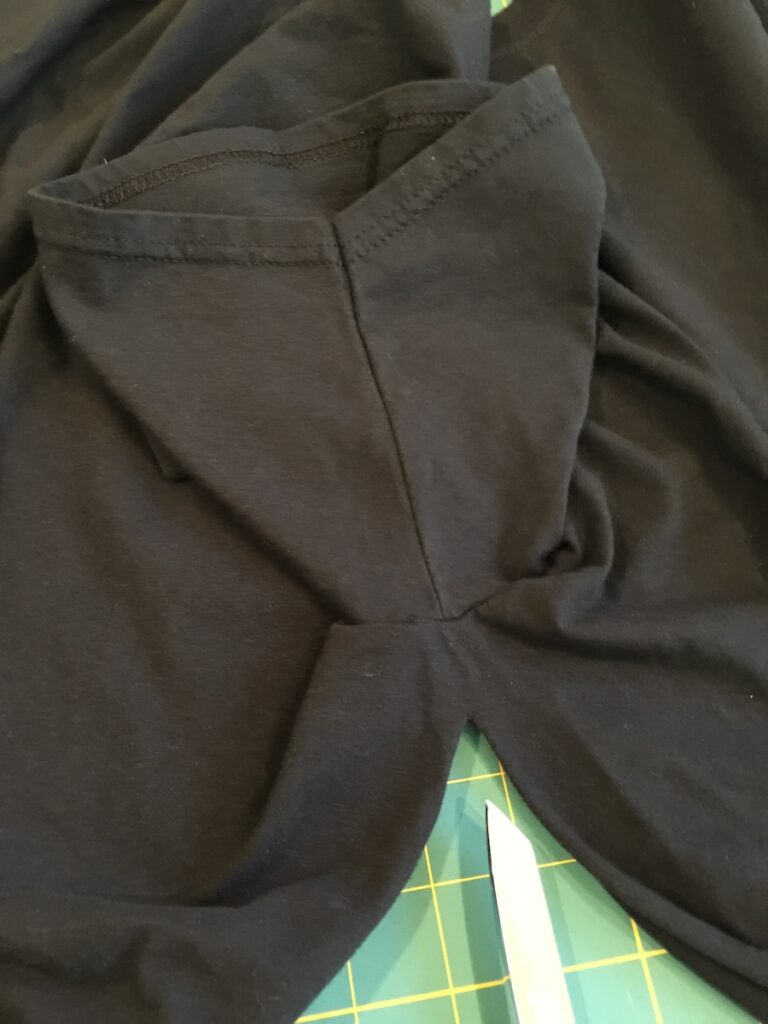
And here we are approaching the sleeve seam.  Go all the way right through that seam and and then cut in the same way up the other side seam.  Then, open up the shirt.  Next cut off the sleeves by following the armscye seams exactly with your scissors.

Lay the sleeves out flat together, right or wrong sides together, your choice, and set your chosen sleeve pattern on top of the aligned sleeves.  I like to make use of the sleeve hem and this is how I lay out the pattern piece.  Note that I do not touch the sleeve hem when I cut out the sleeves, but only cut the top and sides of the sleeve pattern and that preserves the hem.  You see that I am using the cap sleeve length offered on this pattern and have dropped the underarm seam a little below the hem of the shirt sleeve on both sides equally.  You can experiment with the sleeve length by moving the pattern piece along its vertical axis, keeping the sides an equal distance from the hem, this is what I like:

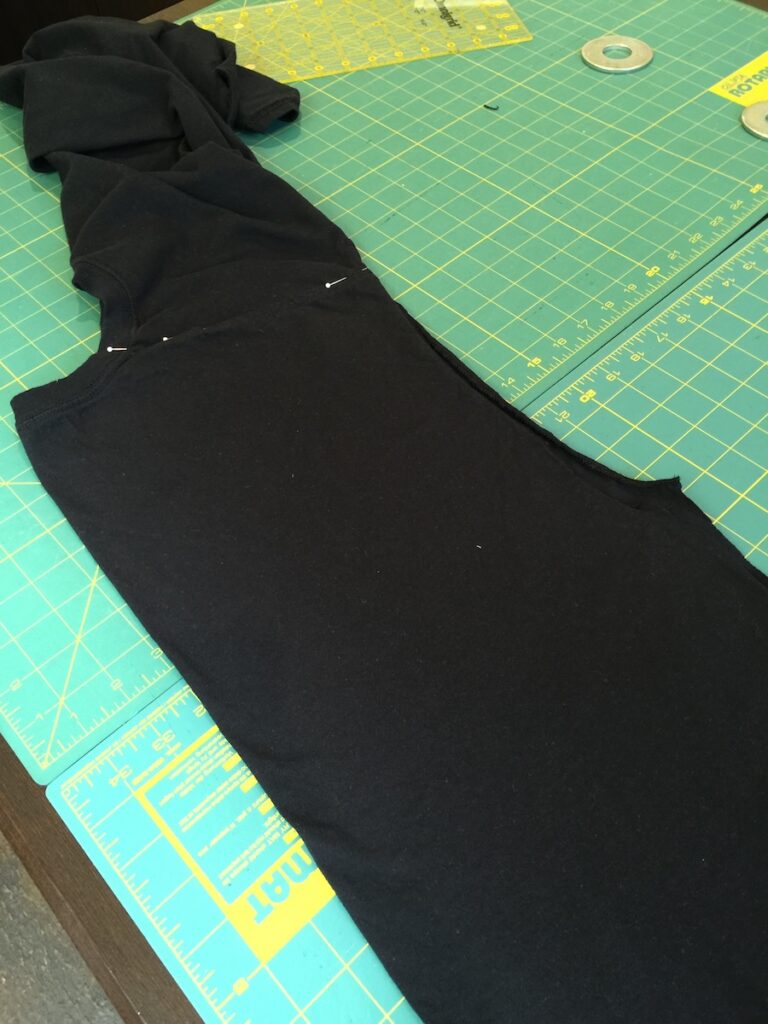
Set those cut sleeves aside and work on the body next.  Lay out the shirt with the neckband and shoulder seams intact like so:

Line up and match the 2 shoulder seams, folding the shirt along the center back and center front keeping right sides out, wrong sides together:

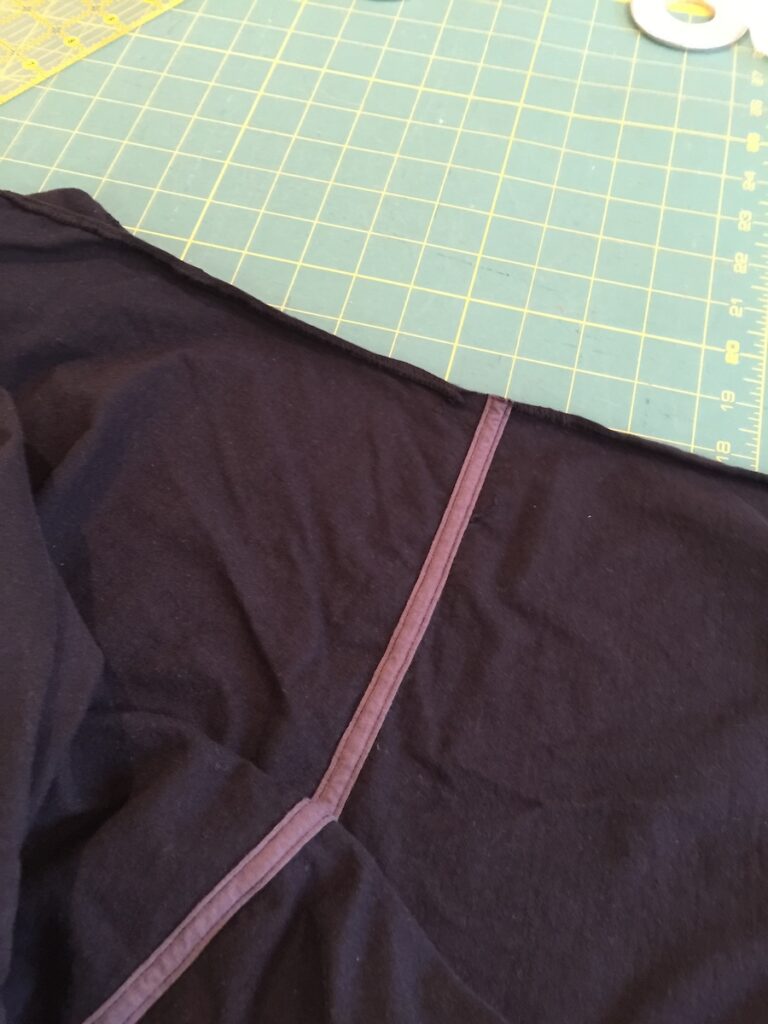
It will look like this photo below from the right side when it is lined up correctly.  Wrong sides are together, match up and pin together the 2 shoulder seams:

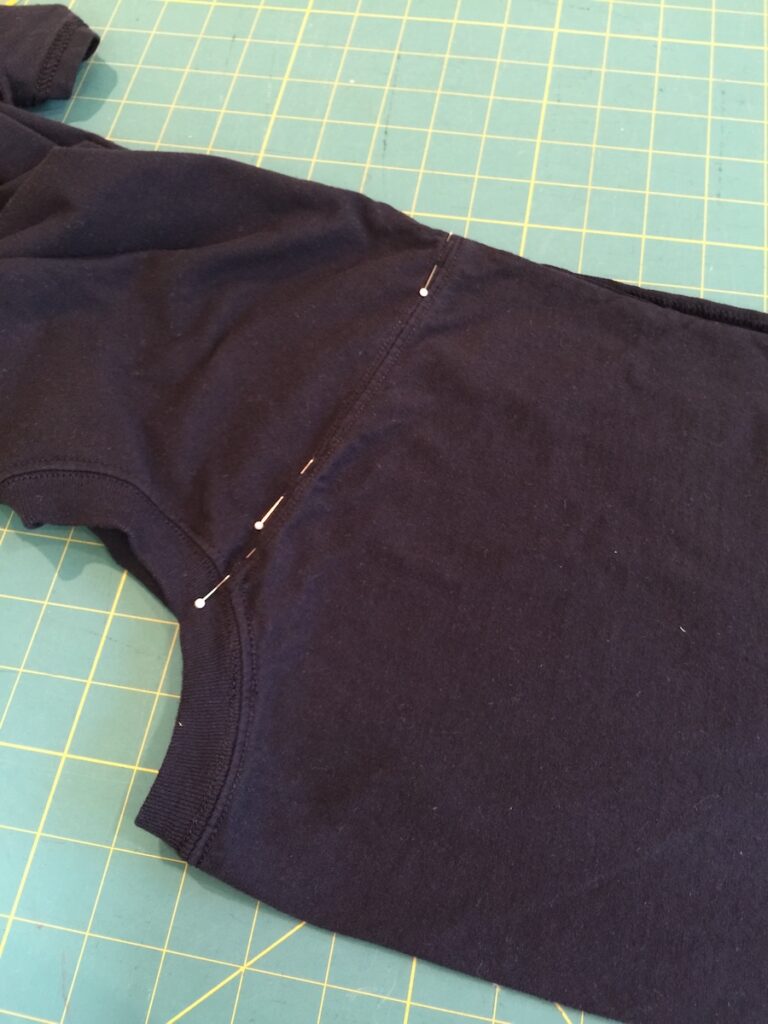
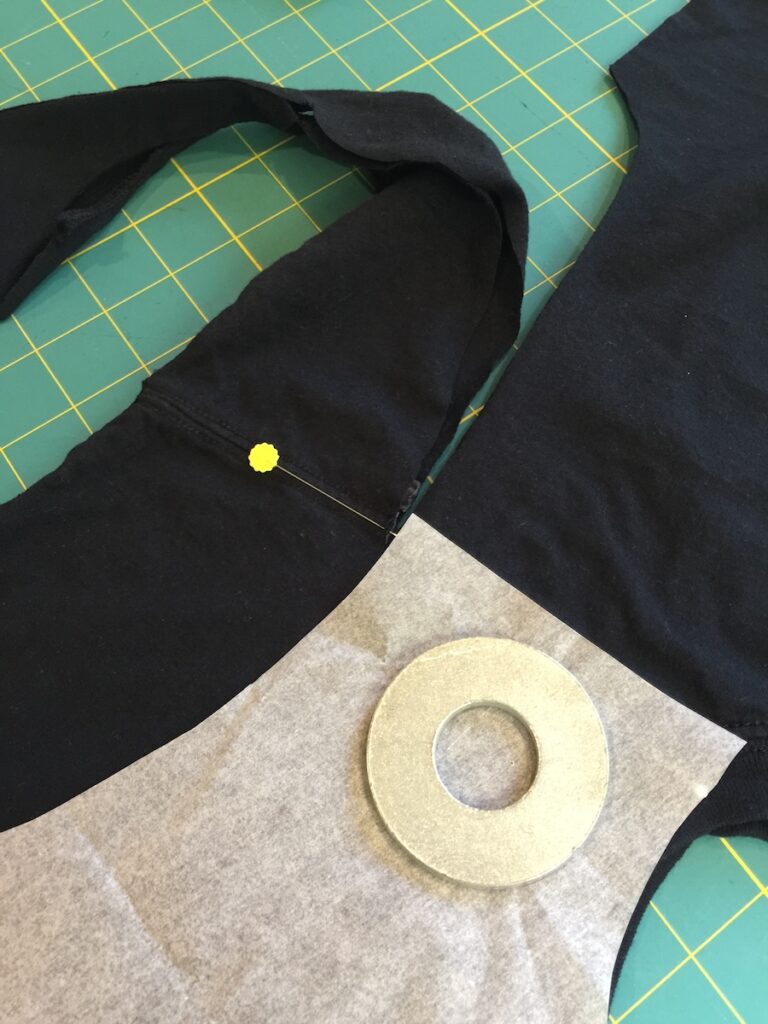
A wider view of the shirt to this point.  On the left is the center back fold.  On the right are the cut side seams and armscye all lined up with pins securing the shoulder seams together:

Next, you will place the center back of your back pattern piece on the center back fold line you’ve just created in the shirt as best as you are able.  Please note as shown in the closeup photo below that I am matching the sewing line of the shoulder seam of the pattern to the finished shoulder seam of the original shirt, NOT the cutting line of the shoulder seam of the pattern.  The yellow pin shows the location of the exact shoulder seam.  Jalie patterns have 1/4 inch seam allowances:

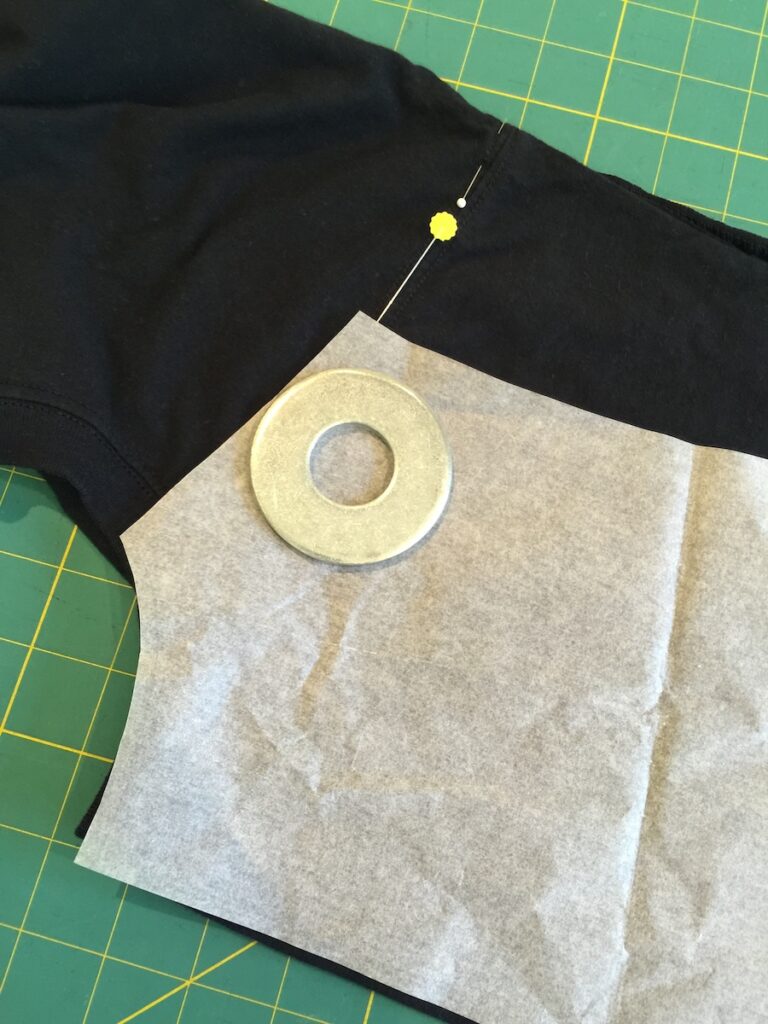
The pattern piece fits well within the shirt everywhere:

Now you will cut across the the hem and then up back side seams up to the shoulder, where you will STOP. 

Remove the back pattern piece and do this exact same procedure with the front pattern piece.  Do not remove the pins that are holding your shoulder seams together.  Here is the front pattern piece placed on the shirt ready to be cut in the same way as the back. The yellow pin is still showing where the shoulder seam is:

Continue to cut down the front side seams to the hem and across your hemline. 

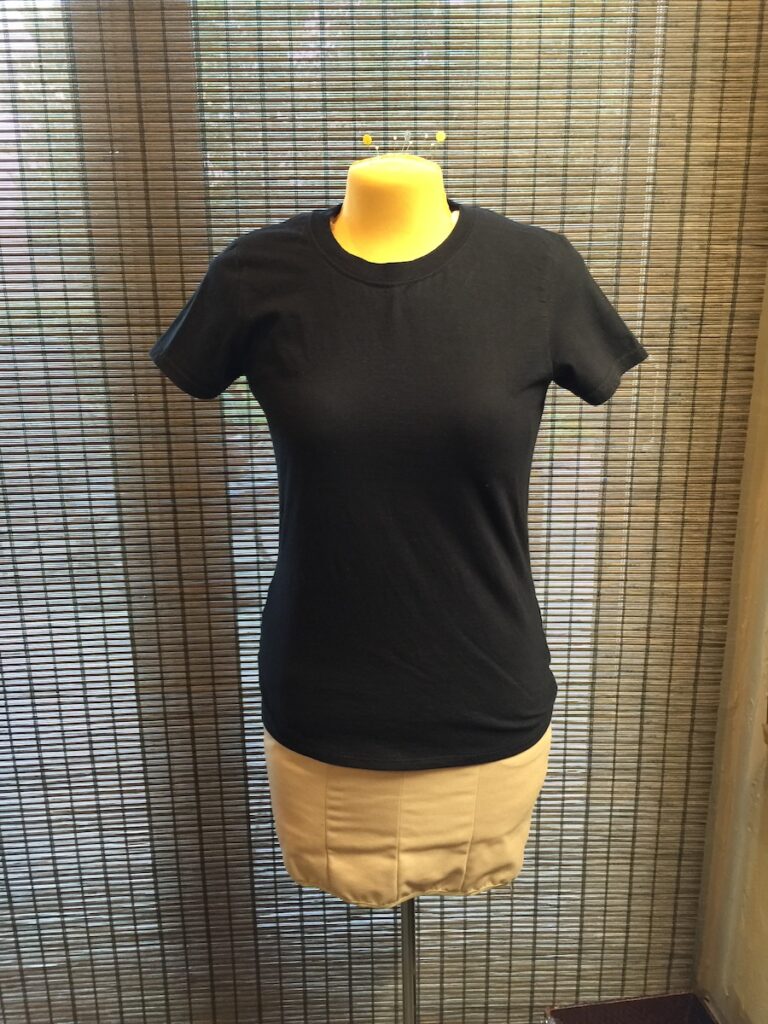
From here, all you have to do is sew the sleeves back on to the new armscye you’ve just cut as you normally would and sew sew up the two side-to-underarm seams, each in a single pass, and then hem the bottom.  The sleeves are already hemmed and your neckline was also finished in the factory.  Here is the final shirt:

There are two further refinements of this method that I employ.  The first I learned from Pamela Leggett of Pamela’s Patterns.  And for the record, she has a pattern you can buy to do this type of conversion in a different way.  I don’t own the pattern because I had already developed my method before I was aware of her pattern.  Some people may prefer her way, which results in a slightly different look.  All of her patterns I’ve purchased and sewn have worked very well for me.  I especially love her pencil skirt pattern for stretch wovens, but that’s a different post!  The refinement I mentioned is to steam the ribbing at the neckline and when it softens from the steam, fold it to the inside of the shirt, pin and top stitch down.  This does make a more feminine-looking, slightly lower neckline with a narrower binding and is very easy to do.  Thank-you Pamela!

The second refinement is to create one pattern piece to lay on top of the shirt by joining the pattern shoulder seams, being sure to overlap the pattern pieces so that you are lining up the shoulder sewing lines, not butting the 2 cutting lines.  Sometimes I do it this way and sometimes the original way.  Depends on my mood that day and it also can depend on the shirt and how it lays once cut apart.  You do have to have a longer cutting space to lay out and cut the combined pattern piece in one go.

It definitely takes longer to explain how to do this than to just do it!  I can make one of these shirts in under 2 hours easily. 


Investments

Lately I’ve been dragging out and wearing garments I made long ago and this winter-themed vest and its companion jacket is what I chose to wear yesterday. I guess I’ve been overdoing it on the vests because I was asked the very impertinent question, “How many vests do you own?” I didn’t know so I went home and counted. Answer: 19.

Well, I like vests, all kinds. So what of it? I think I might create or buy another one soon to make it an even 20. Investments pay dividends in wardrobe versatility.

What’s an Ort?

No, an ort is not an astronomical phenomenon.  It’s a small scrap or remainder of something you’ve consumed (generally eaten).  But if you guessed Astronomy, you’d be closer than you think because there is something called the Oort cloud that is an accumulation of icy debris at the edges of our galaxy from which comets are born.  It was named after a person named Oort. 

That’s all interesting, but for today’s post, we are actually talking about small bits of thread that are too short and/or frayed to use anymore that are left when you sew, embroider, quilt, etc.  These little bits of thread are a nuisance and it’s best to keep them contained in your work area.  For years I’ve used little origami boxes for this purpose, and they’ve worked well, but they are wearing out from being folded and unfolded so many times.  Somehow, I came across a couple of patterns online for “thread catchers” made of fabric.  I call them ort boxes, but they are not boxes at all.  Really, they are teeny-tiny garbage cans.

Here’s a photo of the 2 designs I’m testing:

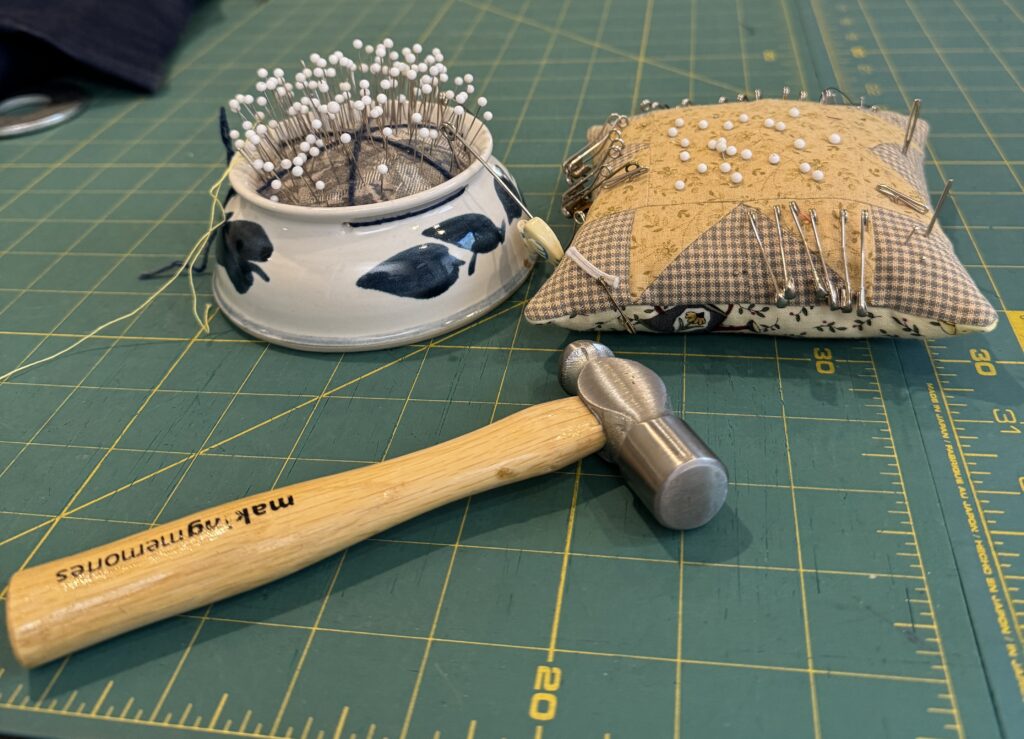
Here they are all ready to receive spent thread ends.

But it’s very important for the ort boxes to collapse to keep the threads contained during storage and/or transport until they can be emptied.  So here they are collapsed:

They are both quite light small and yet can hold a lot of thread snips so I think both will do the job nicely.  I’m partial to the way the circular one closes like a camera aperture with a twist of the wrist, but I’m also a fan of the triangular one because it gets flatter, has an interesting shape when closed and is cuter because of the buttons.  What is it about non-functioning buttons that makes things so cute?  The buttons do serve a purpose here, which is to hold the flaps in place when the box stands open, but that job could be done as well or better with any bit of felt stitched in place or just a simple thread tack.  The buttons definitely add panache.

If you should want to make your own ort box(es), just Google “Thread Catcher Pattern” and you’ll be off and running.  Tutorials abound.  I didn’t change anything about the triangle design.  For the round one, I did substitute a canning lid ring for the ring cut from a Pringles Box.  I don’t eat Pringles.  Nor do I know anyone who does.  Are Pringles really even food?  I think the jury’s out on that question, but that’s another post entirely.

Seams Great by Dritz

Seams Great is a product for encasing raw edges of fabric to prevent fraying.  It has sadly been discontinued, but there are some alternatives:

  1. You can make your own.  I’ve got some 15 denier nylon tricot fabric on order to do this.  All you have to do is make a continuous bias tape the width you want.  The original was 5/8 inch.  You’ll want to determine the direction of the curl so you can place seam allowances of the joins on the side you prefer.  The nylon curls so that the right (public) side is on the outside. There are many tutorials online describing how to make continuous bias tape.
  2. Buy a similar product from Farmhouse Fabrics, which is selling it as “Seam Finish.”  They are still offering it as of February 2023.
  3. Try to buy some on Etsy or Ebay, but as of February 2023, there was none available.
  4. Use an alternative seam binding product like rayon seam tape.  Not as easy to apply, but very pretty.  Wawak offers it in a slew of colors.

What makes the original stuff so great is that curl I mentioned in option 1.  As you apply it, you stretch it just a bit and it wants to curl right around the raw edge you are finishing.  It’s also extremely lightweight and doesn’t add bulk to the raw edge and is a very sheer light gray color so it doesn’t visually stand out. I could not find that gray color in 15 denier nylon anywhere so I settled for natural/cream.  It’s always so sad when a favorite crafting product or sewing notion is discontinued.

Spring anyone?

It’s quite cold here for our usually temperate climate, but then it IS winter and so many folks across the country are really suffering from the effects of winter weather that I can’t really complain.  But I do know that spring comes early and I’ve been focused on making some things that have 3-season wearability.  Here’s a recent combo.  I believe I may have gotten both of these fabrics at JoAnn’s, proving once again that you can find decent fabrics there for garments if you really slow down and look.  The pants are linen and the top is a brushed poly or maybe poly/lycra knit that is butter-soft and quite stretchy.  Once I took the pictures, I switched to some deep dark olive wool pants and a red wool jacket because it’s it’s in the 30’s outside right now and not expected to get above 54 at the highest today.  I know that’s a balmy day in Minnesota but it sure feels chilly to this California Girl.  I do love the versatility of this top.  Because of the many colors in the print, it can go with all the red, navy and olive green solid coordinates in my closet.

I don’t generally pay much attention to where design motifs fall when I sew because I don’t care for the “fussy cut” look you get if you plan where everything lands and match motifs over seams and so forth, but maybe I should plan ahead a little more when a design has perfect circles in it like this one.  I just got lucky that the prominent blue circle medallion in the design fell in mostly inocuous places and the secondary circles in the design did the same.  Lucky is often better than good.  Here are side and back views of this outfit below.  Incidentally, I can see that I need better makeup and better lighting for these photos and a fresh shorter haircut for spring.  Warning, I might go REALLY short again with the hair.  Will my electronic devices still recognize me if I do?


C’est Fini

Well, the first sketch in someone else’s book is now finished and sent off to the next artist, about a month ahead of schedule.

And this has allowed me to go back to my own personal perpetual sketchbook and get back to work there. This is my first image that adds to something from the previous year since I started about this time last year. There are some lengthy gaps in the year, but I’ll make a real effort to put something in every gap this year. It will be interesting to see if the gaps tend to want to occur in the same places each year.

And here’s the real magic if this kind of work: when I opened the book and saw that mantis sketch from this time last year I remembered everything about the day the boys and I discovered the mantis on our pickle ball net and took photos:

I posed him (Her? Who but another mantis knows for sure?) on a lichen-covered branch I’d collected over at the coast. My journal, my rules. No true naturalist would unite 2 finds collected at such distances from one another in both space and time, but it made for a much nicer image. Style over substance? Sure, but the nature journal police are not welcome here:

Yellow Star-thistle is a noxious invasive weed, but I can’t resist wanting to draw those spiky thorns. This specimen was collected on my morning walk around the River Nine sewage treatment plant last Monday. As Mom used to say: there’s the effluent of the affluent. She did have a way with a phrase.

The other project finished this week was Isabel “Izzy” the doll and her blue jammies. This is a joint project with Penelope.

All in all, a productive week.

Best. Pants. Ever.

For some time I’ve been looking for a good pull-on pant pattern for woven fabrics in both crop and full length styles.  Lots of people on PatternReview love the Pietra Pants because they have a flat front, ingenious and capacious pockets plus both wide and narrow leg options.  So I tried the Pietra:

And you see the style is appealing, but the fit on me was completely wrong.  While the pants were a little snug getting over my hips, once on, I couldn’t keep them up at the waist.  They sagged, they bagged, they were essentially unwearable.  I decided it was due to my curvy waist-to-hip ratio.  These pants look great on people with straight figures, but on pears or hourglasses, they don’t work as well.  So next I decided to try the Sew House Seven Free Range Slacks.  

It was summer when I first tried these pants with some random blend washable linen-look fabric from stash.  These immediately became my favorite summer crops:

Since I rarely tuck tops in, the full elastic waist is not usually an issue, but even if it shows, I think the depth of the waistband gives it a little better look than a standard elastic waist pant.

  The pockets are handy and just wide and deep enough to accommodate my phone in its case in a pinch.  I’d rather not carry that beast in my pocket, but sometimes you must.  Another attraction of these pants for me is the high waist.  Pants are always more flattering and more comfortable on me if they have a high waist.  I’ve struggled for decades with the low-rise pants dominance.  

Nice pants.  I wore them constantly the rest of that summer and then as winter approached, I went looking for some fabrics in stash to make some warmer versions.  This wool fabric was the first:

The straight leg version is great too.  I have since made these pants in lightweight denim, linen/cotton blends, and wool blends in both the wide and straight leg versions.  These are my happy pants for both wearing and sewing.  The sizing is true to the envelope measurements and closer to ready-to-wear standards than the usual Big 4 pattern sizing, if a little on the short side.  I’ve added about an inch to the inseam for full length pants and don’t roll a cuff. 

The instructions are clear and thorough.  I could make a pair of these in a day if needed, but I usually do it over 2 days, cutting and making the pockets on the first day and doing the rest of the sewing on the next day.  As the title indicates: Best. Pants. Ever.

Smooth as Silk

DGS number 4 has some itchy skin/eczema and needs to have his hands covered while he’s sleeping to prevent him from scratching. So we have covered the ends of the sleeves of his onesies in silk backed with cotton. Sleep peacefully baby boy!

Origami Mask

In the diy Face Mask Category, the Àplat Origami Face Mask, is a clear winner. They are fast and easy to make, don’t require a nose wire to get a good fit, don’t shift around when you talk and, at least on me, have a little air gap in front that makes breathing easier while still fitting close to the face on the sides.

You do see a little gap back by the ear, but that is okay because over the cheekbone and down the side of the face the fabric is touching my face all the way. In the side view I’ve circled the area that sits close and touches my face:

You certainly could try to make a little dart there for a better fit, but I don’t think that’s necessary.

Here’s my nicely pressed collection:

So far. I intend to make a few more to coordinate with colors I wear frequently and just because these are fun and easy to make. Btw, the pressing helps the masks fit better and look nice and tidy stacked in a drawer, all pressed and ready to go. Pressing with a hot iron also further sanitizes the masks after washing and drying.

Sewing for the Baby Boomlet

The babies are arriving here and there and so I’ve been sewing baby things like burp cloths and these little tunics/dresses:

May I just say that Brindille and Twig has the best patterns going for baby clothes that fit and are practical? This is their angled dress, second and third iterations.

  • It’s still fun to sew for the boys as well. These panels for a play mat were an irresistible find at a quilt shop I visited recently. If I had it to do again, I’d make 4 separate mini mats that could be reconfigured in various ways, but doing it this way has produced the desired effects:
    • When the boys play with it, there is room for both of them.
    • It doesn’t scoot around or get wrinkled, but lays flat and stays in place.

    This was prior to quilting and binding, but you get the idea. Here is my new setup for free-motion quilting using rulers. This is a huge step forward in quilting on a home machine.

    Another reason for making 4 smaller quilts is that they would have been much easier to maneuver on my machine with its small harp area. It felt like wrestling with a bear at some points during the process.

    Now it’s time to sew a few things for myself for this summer. I’ve got white thread in my serger and coverstitch machines so I think I’ll make up some things that will not require rethreading. Lazy-girl sewing!