What’s an Ort?

No, an ort is not an astronomical phenomenon.  It’s a small scrap or remainder of something you’ve consumed (generally eaten).  But if you guessed Astronomy, you’d be closer than you think because there is something called the Oort cloud that is an accumulation of icy debris at the edges of our galaxy from which comets are born.  It was named after a person named Oort. 

That’s all interesting, but for today’s post, we are actually talking about small bits of thread that are too short and/or frayed to use anymore that are left when you sew, embroider, quilt, etc.  These little bits of thread are a nuisance and it’s best to keep them contained in your work area.  For years I’ve used little origami boxes for this purpose, and they’ve worked well, but they are wearing out from being folded and unfolded so many times.  Somehow, I came across a couple of patterns online for “thread catchers” made of fabric.  I call them ort boxes, but they are not boxes at all.  Really, they are teeny-tiny garbage cans.

Here’s a photo of the 2 designs I’m testing:

Here they are all ready to receive spent thread ends.

But it’s very important for the ort boxes to collapse to keep the threads contained during storage and/or transport until they can be emptied.  So here they are collapsed:

They are both quite light small and yet can hold a lot of thread snips so I think both will do the job nicely.  I’m partial to the way the circular one closes like a camera aperture with a twist of the wrist, but I’m also a fan of the triangular one because it gets flatter, has an interesting shape when closed and is cuter because of the buttons.  What is it about non-functioning buttons that makes things so cute?  The buttons do serve a purpose here, which is to hold the flaps in place when the box stands open, but that job could be done as well or better with any bit of felt stitched in place or just a simple thread tack.  The buttons definitely add panache.

If you should want to make your own ort box(es), just Google “Thread Catcher Pattern” and you’ll be off and running.  Tutorials abound.  I didn’t change anything about the triangle design.  For the round one, I did substitute a canning lid ring for the ring cut from a Pringles Box.  I don’t eat Pringles.  Nor do I know anyone who does.  Are Pringles really even food?  I think the jury’s out on that question, but that’s another post entirely.

Seams Great by Dritz

Seams Great is a product for encasing raw edges of fabric to prevent fraying.  It has sadly been discontinued, but there are some alternatives:

  1. You can make your own.  I’ve got some 15 denier nylon tricot fabric on order to do this.  All you have to do is make a continuous bias tape the width you want.  The original was 5/8 inch.  You’ll want to determine the direction of the curl so you can place seam allowances of the joins on the side you prefer.  The nylon curls so that the right (public) side is on the outside. There are many tutorials online describing how to make continuous bias tape.
  2. Buy a similar product from Farmhouse Fabrics, which is selling it as “Seam Finish.”  They are still offering it as of February 2023.
  3. Try to buy some on Etsy or Ebay, but as of February 2023, there was none available.
  4. Use an alternative seam binding product like rayon seam tape.  Not as easy to apply, but very pretty.  Wawak offers it in a slew of colors.

What makes the original stuff so great is that curl I mentioned in option 1.  As you apply it, you stretch it just a bit and it wants to curl right around the raw edge you are finishing.  It’s also extremely lightweight and doesn’t add bulk to the raw edge and is a very sheer light gray color so it doesn’t visually stand out. I could not find that gray color in 15 denier nylon anywhere so I settled for natural/cream.  It’s always so sad when a favorite crafting product or sewing notion is discontinued.

Plan ahead, or…

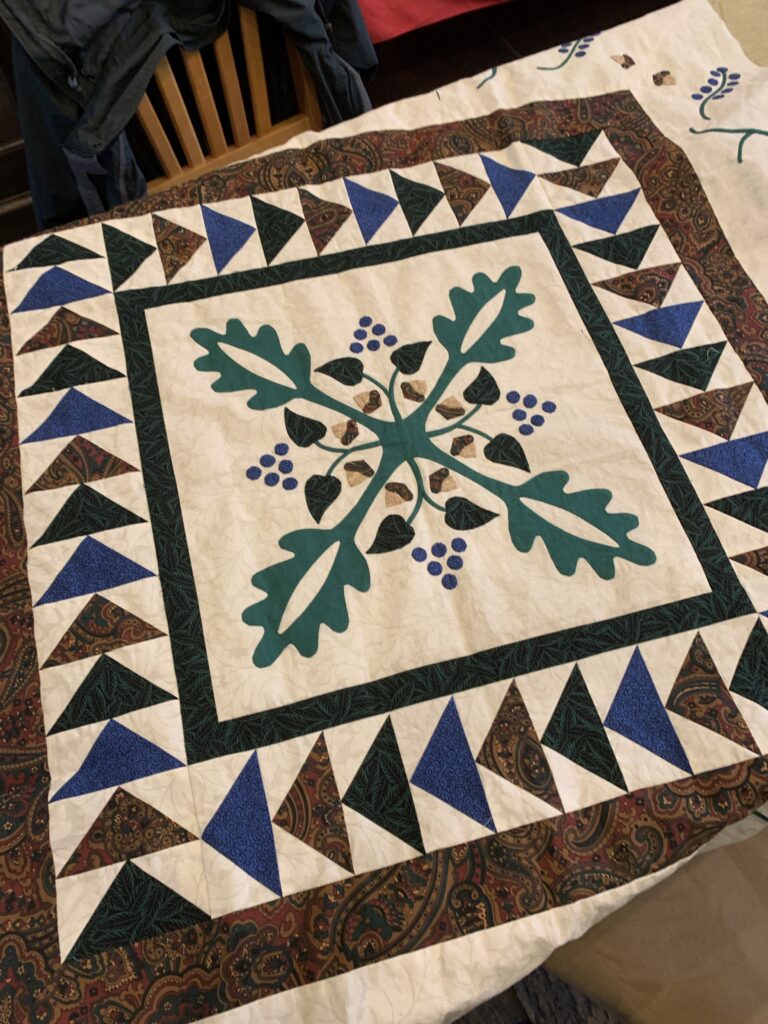
You’ll have to be really creative to solve the problems you create for yourself. Many, many moons ago I started this oak and berries appliqué quilt top. I did the appliqué on the center of the medallion style design. It’s easy to cut your fabric a little larger than you need it to be, then do your appliqué and after it’s done trim and true everything on a small block like this center piece.

So far, so good.

But then come the borders. And the design for the large appliqué border that comes next after the flying geese and solid borders cannot be done in pieces because the design travels across the corner miters. Without pausing to think beyond that insight, I sewed on those borders with mitered corners, traced the design on and started doing the appliqué. Then this started happening:

Hmmm, that’ll eat up a 1/4 inch seam allowance in a hurry and I’m only about 1/4 of the way through the appliqué work on this border.

Well now, this border pretty much has to be done this way. I suppose you could do it in pieces all except for the corners, then construct it, then finish off the corners, but that method has no appeal and I’m sure it would have presented equally thorny issues. So since we’re on this path, let’s go to the Internet and see what quilters recommend for stabilizing the raw edges of hand appliqué projects…

  • Starch: too messy and can discolor over time and attract pests.
  • Making the background bigger and trimming later is the standard advice but we already rejected that because of the design.
  • Folding the raw edges and basting them down; that idea has merit, but the raw edge is still somewhat exposed plus that fold is going to get abraded and dirty and will never press back out.

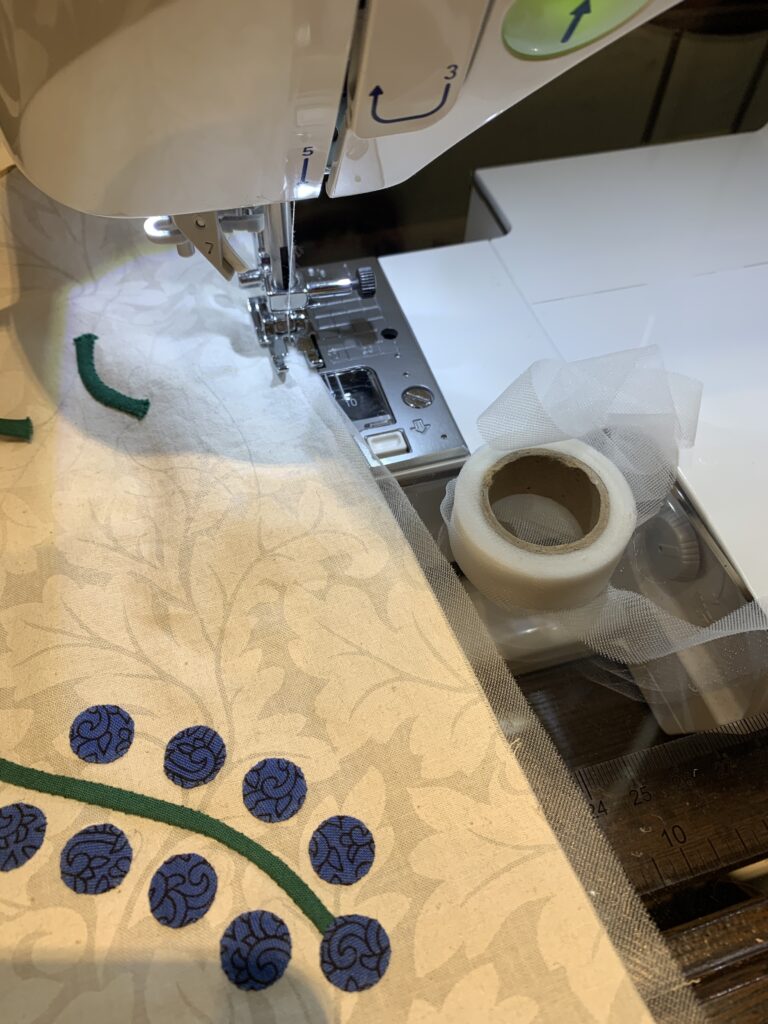
Well, the Internet wasn’t much help but, wait, wait, could I baste bias tape over the edges? Yes, now I’m thinking: do I have enough purchased bias tape on hand? It would be a little bulky on that edge. Hand basting it on would be a pain. But while I’m mulling this over, I may as well go look for bias tape. On the way to the bank of drawers that houses bias tape…Hah! Light bulb moment! I have a product in there designed to stop raw edges from fraying that is 100% reversible and can be quickly applied by machine. It’s called Seams Great. And it is!!!

This stuff is the ticket. I’m using the longest stitch my machine has and I’ve loosened the top tension a bit for easier removal later.

That problem is solved. Now how to stay motivated and finish this aged UFO. I’m in a finishing mood now, but tomorrow, who knows?

UFO from 1990-something…

Pink and Gray Quilt

Finished this quilt today.  That’s one UFO off the list and some decent practice refreshing my machine quilting skills, and boy oh boy were they rusty!  I’d never attempted a freehand free-motion feather border before.  Will be doing more of that.  On to the next UFO + Stash-busting project, a top I cut out a few months ago.

…and the quilt frame

BOM quilt on frame

This project was put on hold indefinitely for a few reasons.  In the meantime, smaller projects have been finished on the frame and the problems/reasons for not working on this beast have been resolved.  Namely, there is now space for the frame with this over-size quilt on it and I have learned to discipline myself to no more than one hour of hand quilting per day to avoid repetitive stress injuries.

What a happy surprise when I uncovered this quilt I hadn’t seen in ages.  Why, it’s lovely!  This project began as a case of “careful what you wish for.”  Rarely do I win anything in a lottery-style drawing, but I had my heart set on winning these Block-of-the-Month entries back when I was a card-carrying member of our local quilt guild, Country Crossroads Quilters.  It was an unusual project in that everyone had a small piece of the same theme fabric and each quilter was to add companion fabrics and use a block design of her own choosing.  Those of you familiar with these types of activities know that generally participants are given a general color scheme and/or one theme fabric and a designated block design.  So the winner gets a number of blocks that generally coordinate color-wise and are all the same design and she sews them together and has an instant quilt top.  That’s the general theory.

Giving people carte blanche on the design of the blocks made for an interesting assortment and giving a theme fabric with so many colors meant that there wasn’t even really a consistent color theme as some quilters opted to bring out the Christmas theme of the fabric and others opted to showcase the purple.

So for once in my life, I did win the drawing.  It may have been rigged by my friends in the group who knew I wanted these blocks and knew I had been a faithful participant in the Block of the Month project for ages and had never won the blocks whilst some had won multiple times or worse, some had won the single time they threw a block in the mix.  Or, it may have been the universe out to teach me that careful what you wish for lesson.  Either way, I “won” the oddest assortment of blocks.  In the end, there were only 13 that were really useable.  Yes, 13.  Hmmm.  So I took the 5 that went together the best (accent on Christmas, no additional purple) and made a medallion out of those, which you can see in the middle of the photo above.  I confess I did add the Celtic Applique myself to the otherwise perfectly serviceable 9-patch block that just needed a bit of a lift and a shift of scale to be placed center front and play well with the rest of the Christmas themed blocks that had lots of white.  The rest of the blocks were used “as is.”  There were a few more that would not play well with the group no matter how I tried to make them settle in.  I waited to set these blocks until the makers of the unused ones were no longer around to see that their blocks were not included.  That took a while.  And the quilting has taken even longer.  Because of the medallion setting, the quilt got huge.  It’s the largest I’ve ever made.  Also because of the medallion setting, there is a lot of design space that cried out for hand quilting, although in retrospect, sending this off for custom machine quilting probably would have been the wiser choice. (Close-up below showing the block I contributed and some of the designs I adapted.)  I am determined to finish this before my hands and/or eyes fail me.  I’m currently more than half-way and it’s only taken me 15 years or so.  And when I’m done I’ll have a HUGE Christmas themed quilt.  But it will be gorgeous.

BOM quilt close-up

Why Didn’t I Think of That?

Pinmoor substitute


When I made my first quilt many moon ago, I found a pattern in a craft magazine for an Amish Roman Stripe quilt and I thought the instructions looked simple enough, so I bought fabric and dove in with both feet armed with plenty of garment construction experience and youthful enthusiasm.  This was back in the day before rotary cutters, so I cut everything with scissors!  Did I mention I was much younger back then???

The top went together fairly well for a first attempt and I was so pleased with it I was ready to tackle what I thought was going to be a quick finish to the project. Since I was nearly at the end of the instructions,  I figured I was nearly at the end of the work and would soon be wrapping my baby in a soft and warm quilt until I read on and all that was remaining of the instructions was, “Now quilt and bind it.”  Wait, wait, there must be another page, I thought.  Nope.  Nice top you’ve got there. Now quilt it.  Then bind it. Huh.  Well, I’d purchased the batting and backing fabric because that was indicated at the beginning of the instructions.  So, I decided I would just put the batting between the top and bottom, pin them together and then stitch them on my sewing machine.  I knew this probably wasn’t what was really expected, but I also knew from my sewing experience that it would work and I would have a usable quilt.  So I stretched everything out on the floor and placed straight pins at every block junction on the top and went to the machine.

You might guess where this is going.  All those straight pins were a nightmare.  They did the job of holding the quilt together well enough…when they didn’t fall out…but I had bloody scratches up and down my arms and even some on my legs from when the quilt rested on my lap.  I might as well have been wrangling wildcats as sewing up a quilt.  I just thought I’d made a silly mistake by using straight pins and went off to learn how REAL quilters did things, which in this instance for machine quilting, was with safety pins, duh.

Now here it is all these years later and I find out (on Craftsy, but more about that later) that the most up-to-date millennial quilters baste for machine quilting with, you guessed it, plain old STRAIGHT PINS, and one very clever person has created the product I needed all those years ago: Pinmoor, colorful, re-usable, easy on, easy off little silicone caps to cover the end of the pins and prevent them from falling out and from piercing your skin as you maneuver the quilt around.  So those look really good, but awfully expensive and only available via mail order.

A little more scooting around the ‘Net reveals that someone else uses                Caulk Backer Rod from the hardware store for the same purpose at approximately 1/10 cost.   Well, I ran out to get some of that caulk backer rod today and have basted up this batik fabric to make a small whole cloth table topper and the backer rod works fine.

My hands are sure happy they don’t have to open and close all those safety pins, my arms are happy they don’t have to endure all those painful scratches, my pocketbook is happy I spent less than $4, and my psyche is happy I was on to something all those years ago by basting with straight pins and my solution wasn’t a mistake, it was just a product waiting to be born.


New tools for an old trade

Applique tools


It’s been a while since hand applique was on the front burner so when I wanted to drag out an old project and finish it up, I decided to look around and see what was new in the applique world.  I found the excellent Craftsy.com class called Machine-Finished Hand Applique taught by Beth Ferrier and took a look.  Oh my, glue basting applique pieces is an amazing step forward from either needle-turn or turn-and-baste over freezer paper!  Beth suggests using regular office supply glue sticks as they are cheaper, readily available and she likes the squishy tackiness they give, but I did like this more expensive fabric glue pen by Sewline better than either the Elmer’s purple or standard office supply water soluble glue stick.

I also found the “Purple Thang” stick a bit more responsive than the cuticle stick recommended in the class for pushing and turning fabric. Yes, again, it’s more expensive and only available from quilt notions suppliers while cuticle sticks are cheap and easy to find, but it really did work better for me and so was well worth the price.  Actually, I use both tools at the same time for these very small circles, one in each hand. My fingers are too clumsy by half.

Those little scissors with the green handles are by someone named Karen Kay Buckley and she calls them Perfect Scissors.  The clerk at my favorite quilt shop insisted that if I was doing applique, I should have these little scissors and I should trust her on this.  They are nice.  Supposedly, their micro-serration prevents fraying and they do cut right to the tips and are very maneuverable to cut around complex shapes.  I can’t speak to whether they prevent fraying since with this technique, the glue accomplishes that nicely.  Sometimes you just have to trust.

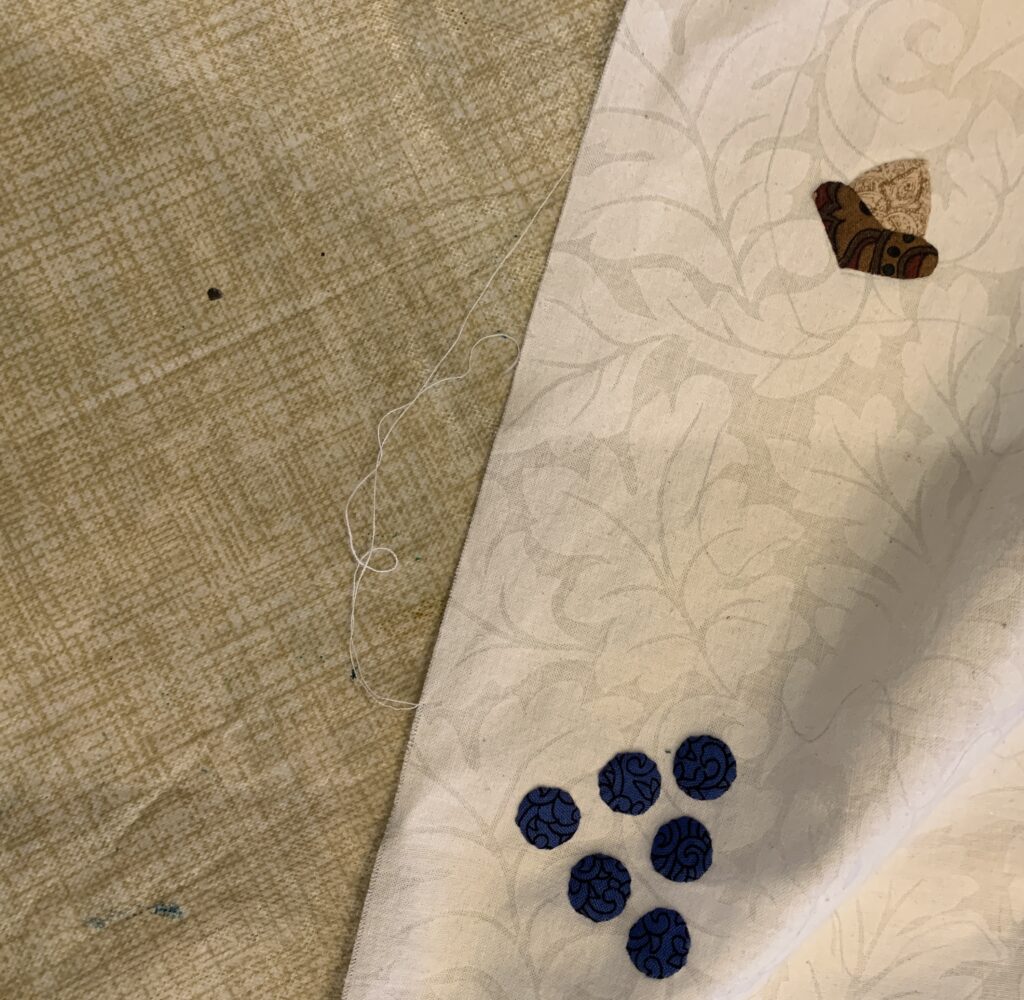
You can see above and below how nice and round my circles are using these new techniques, even though I used a slight variation on Beth’s instructions by putting adhesive dots on top of the fabric as a turning guide rather than freezer paper on the inside.  Will all that glue wash out you ask?  Well, once more I’m going to trust and not worry about it.  Better to have a finished project with a little glue left in it after washing than a glue-free never-finished top lurking in a drawer.

Look at those pretty little circles! Bring on the applique berries!  Thank-you Beth!


Glue baste