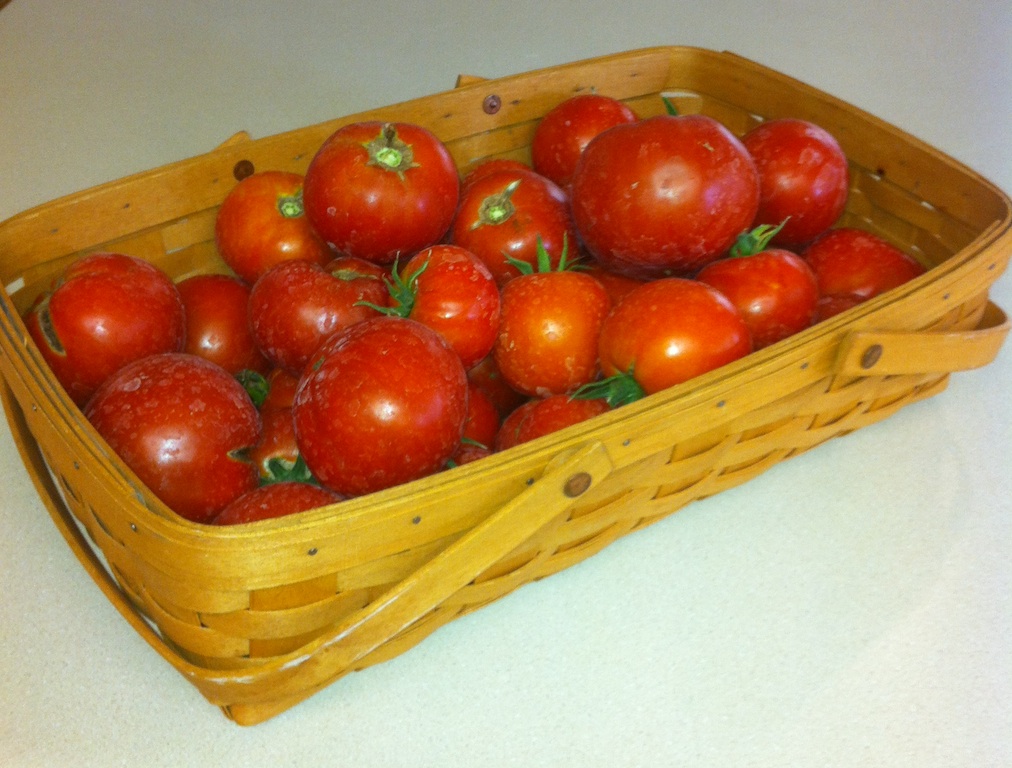
Tomato time has arrived and it’s time to process these beautiful tomatoes from Christine’s Garden and make some Pasta Sauce and some Salsa again this year.
The basic processing is the same whether the end game is Salsa or Pasta Sauce:


Lycopene is.


Tomato time has arrived and it’s time to process these beautiful tomatoes from Christine’s Garden and make some Pasta Sauce and some Salsa again this year.
The basic processing is the same whether the end game is Salsa or Pasta Sauce:
Recently I bought one of these awesome Rinse Well thingies. AKA, “The Watercolor Toilet.” Hah! Because when the water in the well gets dirty, you push that little button and it disappears into the well and fresh water automatically refills the basin. It’s a silly little tool for lazy artists who don’t like to get up and change their dirty rinse water. It’s not perfect. The well is a bit small if you’re doing a big splashy painting, but it’s perfect for dainty dry brush work that doesn’t require a huge pigment load. Also all the dirty water doesn’t disappear so the fresh water in the well is slightly tinged with whatever color was there. But it’s still a cool thing that will work for certain things I do in the studio. I like it. Because I like cool tools.

The other item I’m testing is the switch back to the creation of jpegs on my iPhone. Apple sneakily changed the default file type from jpeg to a proprietary file type they claim is better called HEIC (pronounced “HEEK”) in their last major upgrade. Well that’s a heiccup if you ask me because those HEIC files would upload anywhere and couldn’t be converted without paying for and downloading a conversion app. Grrr. What the HEEK Apple? So it turns out it’s easy to make your phone switch back in your settings under “camera” then “format” choose “Most compatible.” That’s it. And don’t we all want to win the award for Most Compatible? All except Apple.
DGS number 4 has some itchy skin/eczema and needs to have his hands covered while he’s sleeping to prevent him from scratching. So we have covered the ends of the sleeves of his onesies in silk backed with cotton. Sleep peacefully baby boy!

Hello Ankarsrum!

I still remember standing in line at Gemco when it was going out of business so that I could get my first Kitchenaid stand mixer at the best possible price over 30 years ago. This was just after I’d sheared off the dough hooks on my Sunbeam Mixmaster that had been a wedding gift because I was trying to make 100% whole wheat bread. Luckily, the glass bowl didn’t break and it didn’t destroy the mixer, but I knew if I was going to have a chance to make true whole wheat bread I’d need the Kitchenaid. And back then, the Kitchenaid did not disappoint. Early on I purchased the grain mill attachment and managed to seize up the motor when a rock slipped in with the grain and locked down the grinder. Off it went to an appliance repair shop, where they actually fixed it (those were the days!) and that machine lasted over 20 years until it started really sounding tired. So I bought another one. What a sad difference. The new one just couldn’t power through the bread dough. Then I tried a Breville. Same thing. Then I tried a bigger, more expensive Kitchenaid with a “more powerful” motor. Same thing. A little online research turned up this new kid on the block, an Ankarsrum Assistant sold by Pleasant Hill Grains, and King Arthur Flour. I bought mine from Pleasant Hill because at the time they were having a sale. It seemed an extreme amount to spend on a mixer at the time, even on sale, and possibly a mistake because this mixer uses a completely foreign concept in mixing techniques. But I was desperate to find a mixer that could power through the stiffest possible bread dough and bring it to supple perfection without grinding to a halt and/or smelling like smoking motor grease. Done. This beast laughs at 100% whole grain bread dough. It also does a fine job with cookies and cakes and everything I do with a mixer. Unfortunately, although it has lots of accessories it doesn’t have a spiralizer, so I had to keep my Kitchenaid just to make Zoodles with the Spiralizer Attachment and that’s okay because I was able to make space for it and so far it can manage to run that attachment without complaint. But if you think you want to make 100% whole wheat bread, do not hesitate, the Ankarsrum can manage whatever dough you throw at it, our current favorite being Featherpuff Bread from the Laurel’s Kitchen Bread Book.
A word on whole wheat. You really do want to grind it yourself unless you have a miller in town who grinds fresh flour daily. Yeah, I thought not. You will be amazed at the difference in your bread if you grind your own grain and bake it the same day. The flavor is incomparable.
Bon appétit!
In the diy Face Mask Category, the Àplat Origami Face Mask, is a clear winner. They are fast and easy to make, don’t require a nose wire to get a good fit, don’t shift around when you talk and, at least on me, have a little air gap in front that makes breathing easier while still fitting close to the face on the sides.

You do see a little gap back by the ear, but that is okay because over the cheekbone and down the side of the face the fabric is touching my face all the way. In the side view I’ve circled the area that sits close and touches my face:

You certainly could try to make a little dart there for a better fit, but I don’t think that’s necessary.
Here’s my nicely pressed collection:

So far. I intend to make a few more to coordinate with colors I wear frequently and just because these are fun and easy to make. Btw, the pressing helps the masks fit better and look nice and tidy stacked in a drawer, all pressed and ready to go. Pressing with a hot iron also further sanitizes the masks after washing and drying.
But it’s finished after all these years! Probably 8 or 9 years ago I embarked on a crewel embroidery correspondence class through the EGA, or Embroiderers’ Guild of America. As always, half the fun was collecting supplies and tools and notions specific to this type of embroidery, which is traditionally done with very fine wool on a linen twill weave fabric ground.
After a trip to Needle in a Haystack in Alameda, to collect the crewel-specific supplies, I was ready to start. And stop. And start. And stop. Again and again and again. I never got further than one short line of stem stitch because I simply couldn’t stand the tactile sensation and sound of the wool as it passed through the fabric. It was like fingernails on a chalkboard. So I’d put the project aside and then come across it again in a few years and wonder why it wasn’t further along. So I’d hoop it up, thread up a piece of wool, start stitching and remember. Eeew. Scritch, scratch and back in to the cupboard you go!
Finally this summer I decided I could embroider this design with cotton floss and even try out some DMC floche. Ahhh. So here it is:

There’s plenty to critique about this project even without mentioning that it’s not done with the traditional wool, but I’m so happy to have it finished I’ve decided to ignore its flaws, put it into a display hoop and hang it up in my sewing room.
Here is the original inked design after I made revisions to the original design given by Judy Jeroy. Her design is copyrighted so I cannot post it here, but I mostly changed the shape of the motif from an oval to a heart. And in the final stitching I removed a large tulip like flower and added a few tendrils here and there. Making changes to the original design was part of the assignment. As was changing colors and even stitch choices. The class was quite enjoyable, all up to the point of dragging that wool through the linen. I can’t believe it took me so long to figure out what the problem was and then solve it.

Here’s a new dice game we’ve been enjoying over Google Meet or Zoom:
Only instead of buying one of the admittedly lovely wooden versions of the game, I just created a pdf file to print out on standard paper in landscape format with large numbers from 1-12 across the top, printed it out and put it in a plastic page protector. As we use the numbers, we cross them off with a white board marker or children’s washable marker and erase after every round to reset for the next one. Between the actual play and toting up of the the scores after each round, the addition never stops in this game. It’s a sly way to get kids to practice their addition facts.
Have fun!
Sometimes when you drag out old art supplies you find you’ve moved on and nothing works, but once in a while you find a little magic happens, as it did recently when I pulled out some old Walnut Ink and some croquil nibs to draw this little Crassula ‘pagoda village’ plant purchased in Moss Landing. The paper is Stonehenge Fawn.


The how, the why and the joys of creating this most satisfying family soul food, updated with more photos and instructions on how to prepare the cabbage.
1-2 heads of green cabbage
The Method:
Begin by preparing the cabbage. Set out a colander on a large plate next to the stove. Fill a large stock pot half way with water and bring to a boil. While the water is coming to a boil, cut out the core(s) of the cabbage(s) as shown above.

Drop the cabbage in o the boiling water. Adjust the heat to keep the water simmering.

The first outer leaves will fall away easily. Pluck ten out of the water with tongs and place them in the colander to drain.

As you remove leaves, some may begin to cling to the core. You can prevent some of this by enlarging the center of the core you have removed with the knife before boiling, but there will always be some hangers on. Use a carving fork to pry them away.

Like so. As you do this, use the tongs in your other hand to manage the bobbing cabbage head. You can see above that eventually the inner core of the cabbage gets too small to separate the leaves. At this point, let it stay in the water for another few minutes to soften all the leaves left inside. Then pull it out and place it in the colander with all the separated parboiled leaves and allow these to cool as you prepare the filling.

Prepare the filling:
Mix the meat, salt, onion, basil, rice and up a few tablespoons of water thoroughly until all is amalgamated and a smooth mixture is obtained. The basic ratio is 1 teaspoon salt, 1/3 cup uncooked rice, one tablespoon onion and 1 tablespoon basil per one pound meat. Adjust to your taste. I probably use more basil than that. I just keep tossing it in until I like the distribution and scent. The basil is key.
Make the rolls:

Place about 2 tablespoons of the meat mixture at the end of a cabbage leaf. See how nicely it fits in to the natural curve of the leaf.

Begin rolling the leaf, tucking the sides as you go and rolling tightly.

As you approach the end, trim off the thickest part of the rib:

Finish rolling and place in bottom of pot that you have lined with leaves that are either too small or holey or otherwise unsuitable for rolling.

Continue rolling and stack in layers until all the filling is consumed. You should have plenty of leaves left to cover the rolls with extra leaves.

Place an inverted plate atop all.

This prevents the rolls from floating around and unrolling themselves as they cook.
Add tomato sauce and water, one can sauce and 1/2 cup water per pound of meat. Bring to a boil and immediately reduce heat to maintain a simmer. Simmer for 2 hours.

Serve with rice or bulgur pilaf and either pida or wet lavash. What? You’ve never had wet lavash? Huh, well break it in to serving size pieces, run each piece under warm water thoroughly wetting both sides, shake as much of the water off as you can, stack the pieces on a plate, cover with a damp kitchen towel and allow to soften 20 minutes. Now it’s like a tortilla, only better, way better, especially if you roll it with a little butter inside. Take care when removing that plate with tongs before serving the dolmas. We serve it right from the pot so as not to disturb the rolls, but you can remove to a casserole if you’re so inclined.
The babies are arriving here and there and so I’ve been sewing baby things like burp cloths and these little tunics/dresses:

May I just say that Brindille and Twig has the best patterns going for baby clothes that fit and are practical? This is their angled dress, second and third iterations.

This was prior to quilting and binding, but you get the idea. Here is my new setup for free-motion quilting using rulers. This is a huge step forward in quilting on a home machine.

Another reason for making 4 smaller quilts is that they would have been much easier to maneuver on my machine with its small harp area. It felt like wrestling with a bear at some points during the process.
Now it’s time to sew a few things for myself for this summer. I’ve got white thread in my serger and coverstitch machines so I think I’ll make up some things that will not require rethreading. Lazy-girl sewing!